

1.
First step is to get all parts ready for assembly. You will need the print+ DIY headphone kit. If you don't have one, order one online at print.plus/store, or check if your local 3D print store stocks print+ DIY kits.
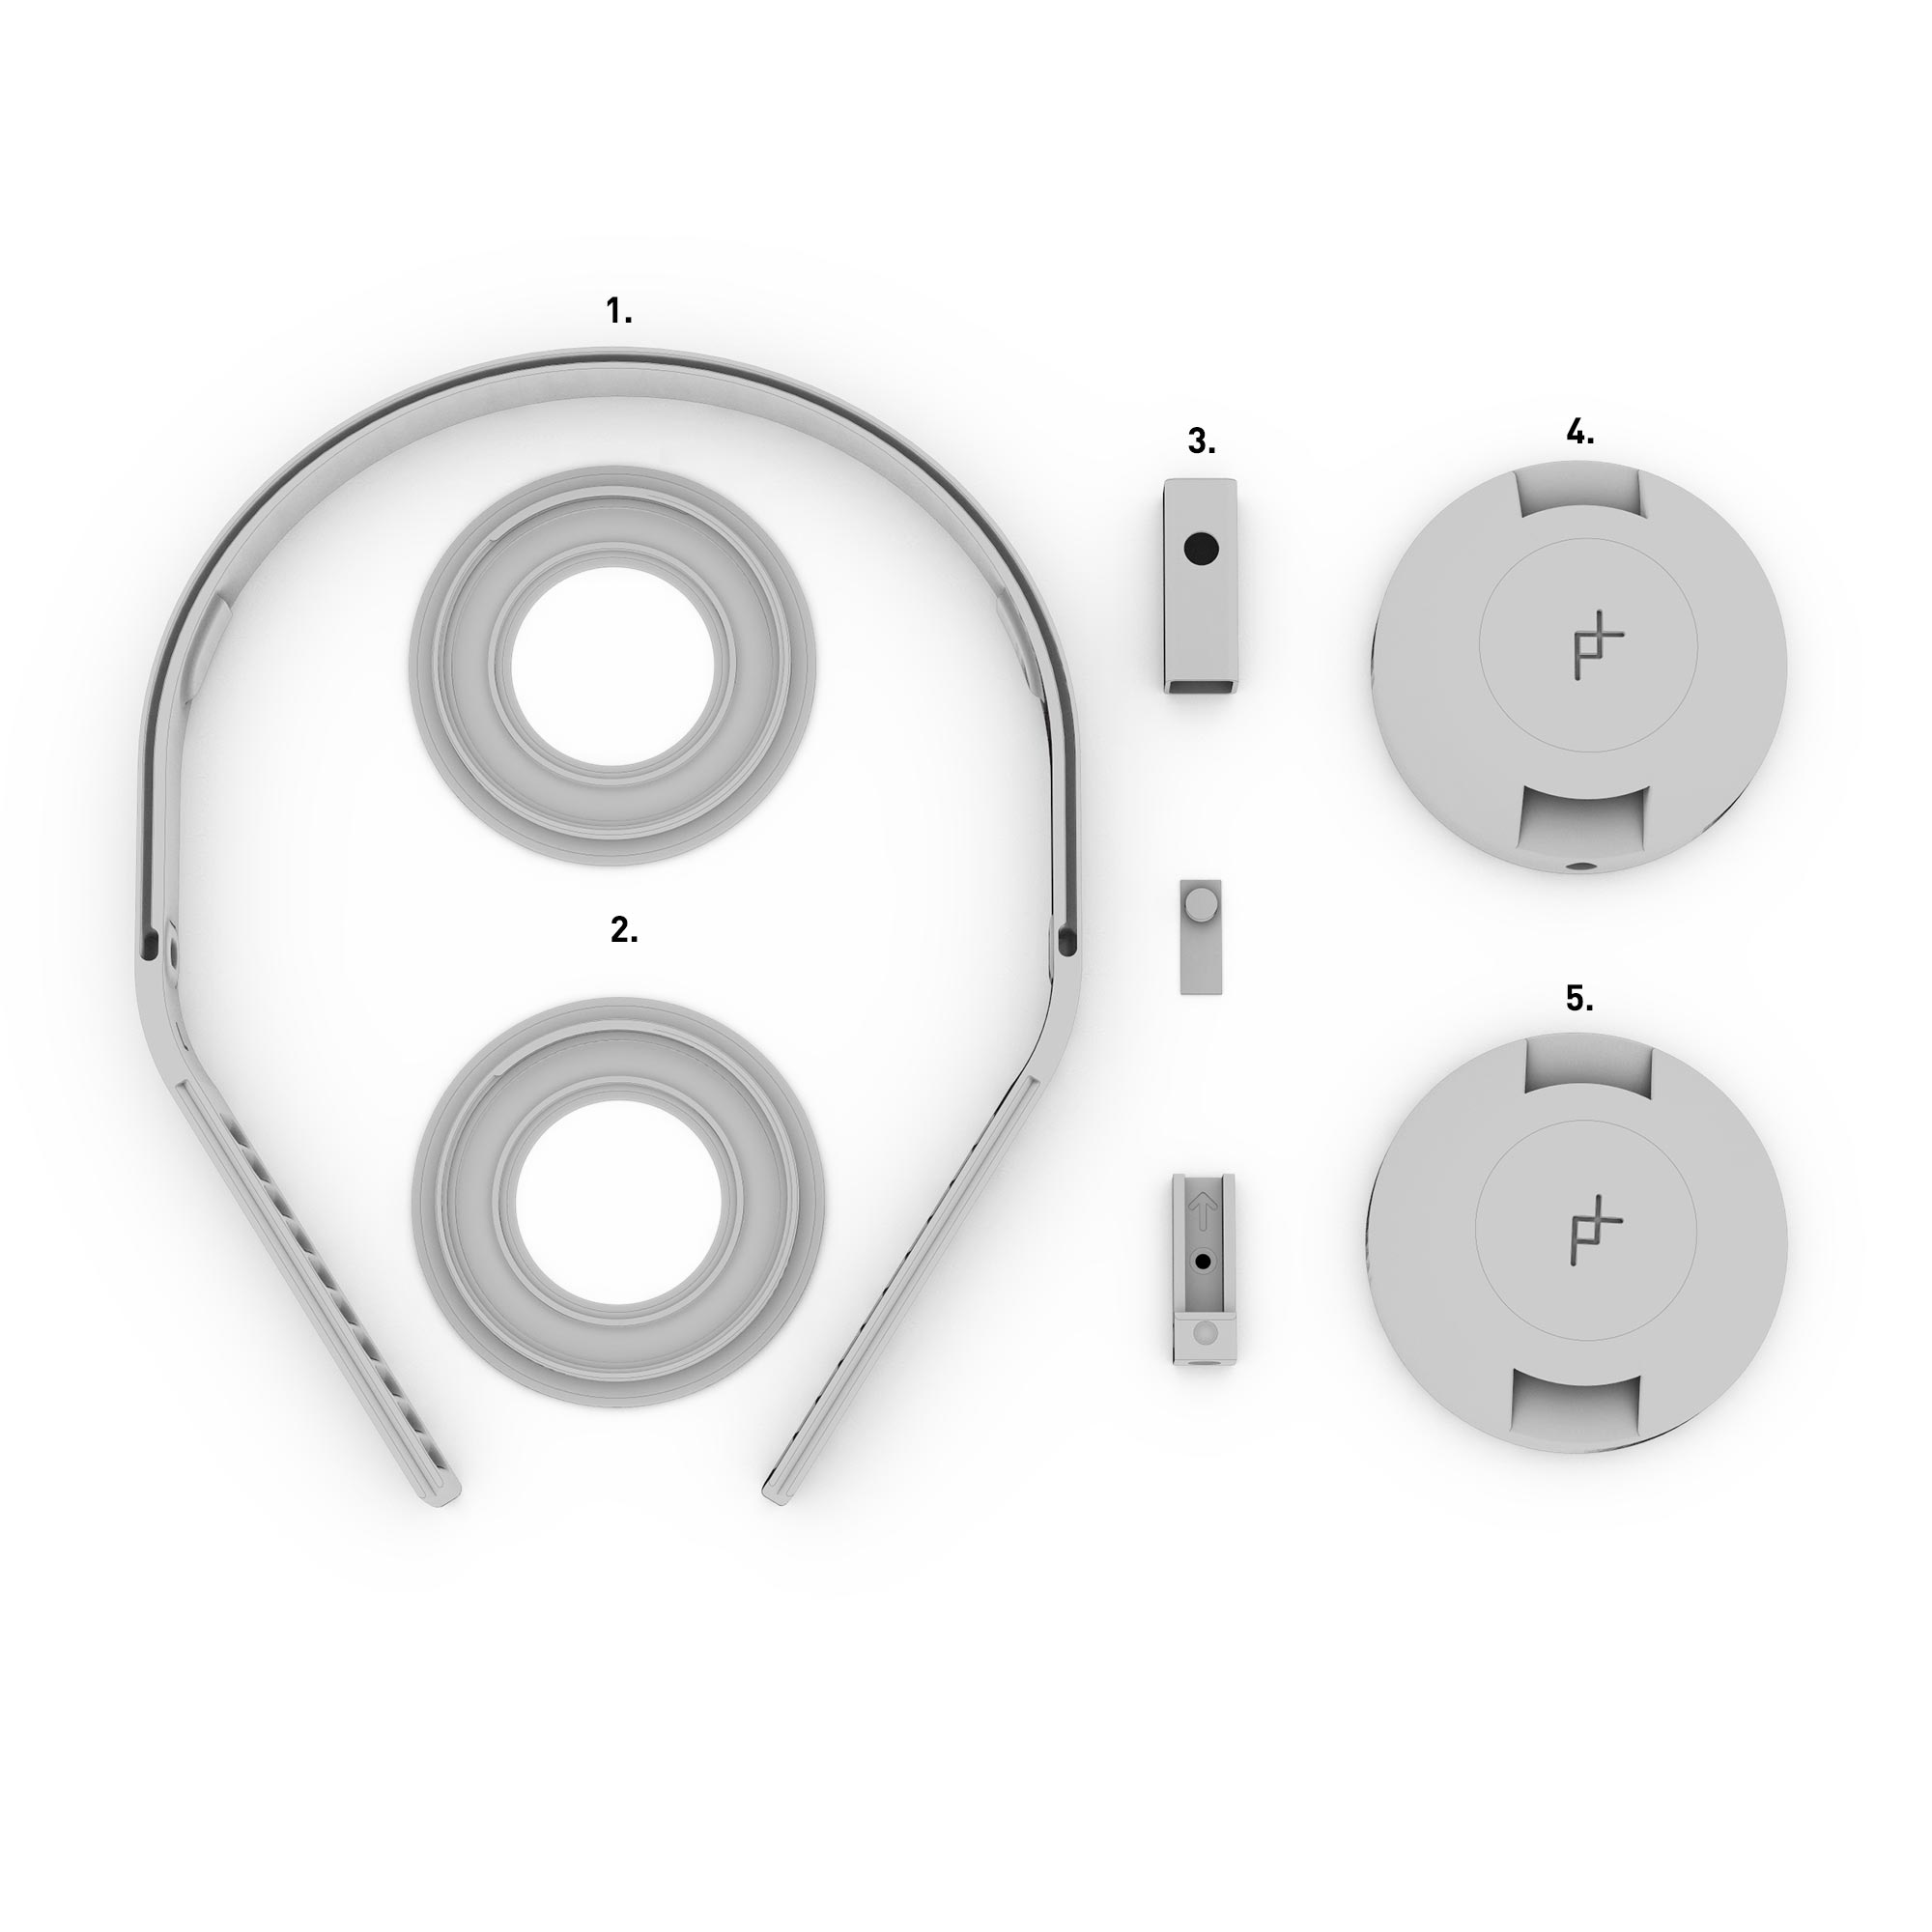
Print+ components:
left speaker
remote circuit board
right speaker
- cushions
- headband
- remote cable
- audio cable
- bridge cable
2.
Download the 3D files of one of the different available designs from print.plus/download and print them on your (friend's) 3D printer or order printed parts from print.plus/store.
3D printed parts:
- frame
- speaker covers
- remote parts (housing, button and tray)
- left speaker housing
- right speaker housing
3.
If necessary, remove all support structures from the 3D printed parts with a pair of pliers or a small knife. Be careful doing so.
note: due to the 3D printing process parts may have some small imperfections in them, make sure to try to piece parts together and test fit components to see if everything came out of the printer correctly.

4.
Start the assembly by making a slight fold in the middle of the bridge cable. Align with the center of the frame. This ensures that the left and right speaker housings will get the same amount of leeway.
5.
Push the bridge cable into the cable gutter along the frame's backside. Feed the bridge cable through the tunnels on the left and right side. Check that the cable length on each side is approximately the same.
6.
Feed the bridge cable through the tunnel that sits underneath the size adjusting mechanism of the speaker housing. Make sure that L and R on the frame and speaker housing are correctly matched (L corresponds with the housing with the hole for the audio jack connector)

7.
Slide the speaker housing over the frame and guide the bridge cable further through the speaker housing.
8.
Repeat step 6. and 7. for the opposite speaker housing so both ends of the frame have a speaker housing with a fed-through bridge cable attached.
9.
Place the L and R speakers L and R into their corresponding speaker housings.
10.
After the speaker is placed, connect the bridge cable and press it into the wave shaped cable gutter/strain relief. If the connector happens to be facing the wrong direction, bend/twist the bridge cable until connector faces the speaker's connector in the right way.

11.
Make sure the bridge connector and speaker's connector are aligned before pushing it down. Only a small force is needed to snap the bridge cable connector onto the speaker's connector.
12.
Repeat step 9, 10 and 11 for the opposite side.

13.
Assemble cushion by wrapping a cushion around a speaker cover.

14.
Repeat step 13 for the opposite cushion.

15.
Screw the cushions on to the housings and tighten them well. Watch carefully if the cushion's flexible ring stays in place and remains invisible.

16.
Slide one end of the headband into the designated pocket in the frame. Then slightly bend the headband and slide the opposite end into the frame. The headband should snap itself in place.

17.
Well done! Next item to be assembled is the inline remote with microphone.

18.
To assemble the inline remote you will need the following parts.
- housing
- tray
- button
- remote circuit board
- remote cable
note: don't try to test assemble the printed parts completely, the remote parts are designed to snap together only once. It will be nearly impossible to take the printed parts apart again without having to break the printed parts.
19.
First step in assembly of the remote is to slide the remote circuit board into the tray.
20.
Next, slide the button into the housing part. Make sure that the button sits in the round hole of the housing.
21.
Slide the pre-assembled tray + remote circuit board into the pre-assembled housing + button. Before snapping the tray into the housing, check if the button is in it's place. Then, carefully press the tray into the housing - the last few millimetres might be difficult as the bumps on the inside of the housing have to snap into corresponding dimples in the tray.
22.
Attach the remote + remote cable between the headphone and audio cable. Make sure the remote is attached with the button nearest to the headphone (doesn't work the other way around).

23.
Congratulations on 'manufacturing' your own headphone! Enjoy!